Saturday, 17 August 2013

Thomas the Tank Engine Birthday


It was my friend’s nephew’s third birthday and he was having a Thomas the Tank Engine themed birthday. Three year olds really like Thomas – evidence here!  They wanted vanilla and chocolate cupcakes and a small cake to put candles on.  Since there were going to be a lot of adults at the party, I thought I’d class up the cupcakes a bit by stuffing them with a raspberry frosting and topping them with Swiss meringue buttercream instead of the American buttercream that I normally use.  We made cupcake toppers with Thomas the Tank Engine stickers and since I’m really into bunting right now, I included one for the cake.

Check out the verdict at the end of the post!

Chocolate cupcakes and cake layer
I used this go-to recipe and made 12 cupcakes and a 5 inch cake layer. 
Fill the cups 2/3 full and bake or 12-14 minutes or until the toothpick comes out clean.
For the cake, cut out a parchment round for the bottom of the cake pan and grease and flour the sides.  Fill 2/3 full and bake for 30 minutes or until toothpick comes out clean.

Vanilla cupcakes and cake layer
I made 1.5 times this recipe to make 12 cupcakes and a 5 inch cake layer.  The only addition I made was the addition of a ½ up for whipping cream whipped to a stiff peak and folded into the batter at the end.
For the cake, cut out a parchment round for the bottom of the cake pan and grease and flour the sides.  Fill 2/3 full and bake for 30 minutes or until toothpick comes out clean.

Swiss Meringue Buttercream
Recipe from here times 1.75

Ingredients
262g (about 9) egg whites
437g (2 cups + 3 Tablespoons) sugar
795g (3.5 cups) unsalted butter, at room temperature, cut into cubes
4 teaspoons vanilla extract
¼ teaspoon salt

Directions
1. Combine egg whites and sugar in the bowl of a standmixer.  Place bowl over simmering water while slowly but constantly stirring by hand with a whisk.
2. When the mixture reaches 140 degrees F., place in the standmixer with the whisk attachment and whip until stiff glossy peaks form and the meringue is cool.
3. Switch to a paddle attachment and mix on medium while dropping cubes of butter one a time.  The mixture will curdle, but mix on high and it will become smooth eventually.
4. Add vanilla and salt and mix.
5. Take out 1 cup for the raspberry filling (below), 1.5 cups to colour green, and divide the remaining amount in half for blue and yellow.  Add gel food colouring and whisk until blended.
Meringue ready for butter.
Buttercream ready for food colouring.

Raspberry filling
Mix 1 cup of Swiss meringue buttercream with ½ cup of fresh raspberries with the whisk attachment until smooth.
To fill cupcakes, fill pastry bag with an elongated tip such as Tip #18. Insert the tip into the middle of the cupcake and squeeze until the cupcake expands a bit.  There should be enough to fill the 5 inch cake.


5 inch Chocolate and Vanilla Cake
Use the chocolate and vanilla cake layers for the bottom and top of layers of the cake.  Fill with remaining raspberry frosting.
Frost the bottom half with remaining blue frosting and top half with green.  Check out a tutorial here.
Use Tip #233 for the grass.


Verdict: These cupcakes were absolutely delicious and were a huge hit at the party! The cupcakes and cake were really moist (because I made the ahead of time and froze them) and the filling was a surprising burst of flavour.  The thing that made them, though, was the Swiss meringue buttercream.  I got so many complements on the frosting and its marshmallow creaminess.  I had made Swiss meringue buttercream before but wasn’t a fan, until now! I don’t know what’s changed in me, but it’s exactly what I’m looking for in a frosting – not too sweet, doesn’t crust, is silky, melts in your mouth, and doesn’t overwhelm the cupcake/cake.  A super successful adult cupcake that the kids also liked! Yay!

Friday, 9 August 2013

Chocolate Raspberry Cakelets and Coffee Frosted Mini-Loaves


I was making cupcakes for a birthday party planned for a week later (I tend to bake ahead of time and freeze) and I had extra batter.  It was a great time to pull out my cute baking cups that had been sitting in my cupboard for maybe 2 years and bake off some treats.  I had some tall cupcake liners and mini-loaf cups that my sister had brought back from Japan.  They were super cute, but the opportunity to use them never really came up as I tend to bake for birthdays and other celebrations and they never really fit.  Well, the time finally came! I had a BBQ to go to that weekend so I decided to experiment with some decorating techniques that I’ve been eyeing for a while and pawning off my experiments to my friends.


Chocolate Raspberry Cakelets

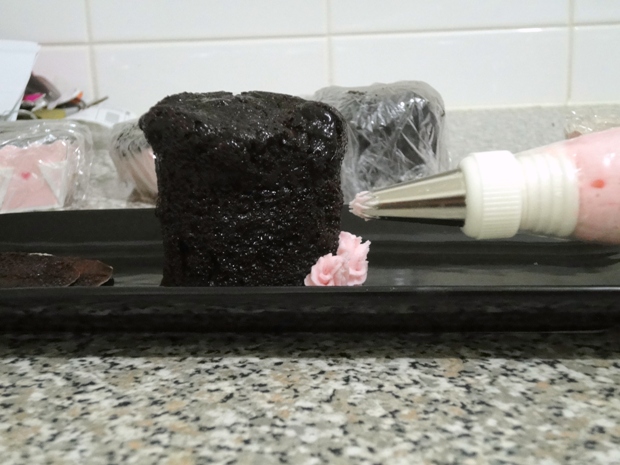
The recipe for the chocolate cake can be found here.  For the cakelets, I filled 3 tall cupcake liners.  After baking, I peeled them off because the dark batter soaked through and turned the liners dark.  Hence the inspiration for frosting the entire cupcake = cakelet!


Raspberry Frosting

Ingredients

1 cup salted butter, softened

4 cups icing sugar

1 Tablespoon cream

1 teaspoon vanilla

½ cup fresh raspberries


Directions

Combine all ingredients and beat until smooth.  It doesn’t get any easier than that, folks!


Decorating

Peel off cupcake lining.  Level the top if it’s too domed.  I left mine as is and faked it with frosting!


Roses – I piped roses with Tip #21 and filled in gaps with the same tip.  Here’s a link to a tutorial: http://iambaker.net/patriotic-rose-cake-video-tutorial/


Petal cake – I piped dots in a vertical line using Tip # 12, then used a spoon to smear the dots to the right.  I piped another line of dots beside the smeared first line of dots and smeared them to the right.  Here’s a tutorial: http://www.youtube.com/watch?v=WASVWn4nN6w


Ombre – I coloured some frosting a darker pink than the natural pink from the raspberries.  After putting on a crumb coat and freezing the cake for 10 minutes, I put the dark frosting on the bottom half of the cake.  I frosted the top half with the lighter colour frosting, then blended them together in the middle.  I dipped my spatula in hot water to smooth out the finish.  Here’s a tutorial: http://www.youtube.com/watch?v=tAMpdOcfzig


Coffee Frosted Mini-Loaves

I had enough batter to make three chocolate and three vanilla cakes in mini-loaf liners.  The chocolate cake recipe is the same as the above, and the vanilla is from here.


Coffee Frosting

Ingredients

½ cup salted butter, softened

2 cups icing sugar

1 Tablespoon cold coffee

1 teaspoon instant espresso powder

½ teaspoon vanilla

¼ teaspoon coffee flavoring (optional to bump up coffee flavor)


Directions

Combine all ingredients and beat until smooth.


Decorating

I used Tip #103 to pipe the ruffles by holding the piping bag perpendicular to the length of the loaf, with the narrow end of the tip facing me, and moving the piping bag slowly up the loaf.  I switched sides after each pipe.


Verdict: I think that these cakes turned out so cute!  It was fun to be able to try out a bunch of decorating techniques in one session on a small scale.  My friend definitely appreciated the experiments – they especially liked the raspberry frosting.  Feel free to add more or less raspberries depending on your taste – I like intense flavor!

Friday, 12 July 2013

Malt Blondie


I was itching to do some baking since the last baking project was a bit of a fail.  I made a 3D pineapple cupcake display for my friend’s luau-themed baby shower, but it was so hot that day and the frosting melted off.  It’s a shame too because the pineapple frosting was really delicious!


Anyways, I wanted to do some baking to redeem myself, plus I was meeting a friend whom I haven’t seen in 4 year because…he went off to med school!  I decided on malted blondies for the new doctor!

Check out the verdict at the end of the post!


Malt Brownies

Ingredients
2 1/3 cup all purpose flour
1 ½ teaspoon baking powder
2 Tablespoon malted milk powder (I used Ovaltine)
1 teaspoon salt
¾ cup + 2 Tablespoon unsalted butter, softened
1 ¾ cup packed dark brown sugar
2 eggs, room temperature
2 teaspoons vanilla
¾ cup malted milk balls, coarsely chopped (I used Maltesers)
¾ cup semisweet chocolate chips
¾ cup chopped walnuts, toasted

Directions
1.  Preheat oven to 350 degrees F. Line a 9x13 inch baking pan with parchment paper.
2.  Whisk flour, baking powder, malted milk powder, and salt in a bowl.  Set aside.
3.  Using a stand mixer, beat salt and sugar until smooth.
4.  Add eggs and beat after each addition.  Add vanilla and beat.
5.  Add flour mixture in 2 batches, beating until just combined.
6.  Add malted milk balls, chocolate chips, and walnuts and mix until combined, 10 seconds.
7.  Press the thick dough into the baking pan with an offset spatula.
8.  Bake for 23 minutes or just until toothpick comes out clean.
9.  Cool for 20 minutes before cutting and eating.
 
Before baking.

After baking.


Verdict: These were not bad.  Frankly, I was expecting them to be amazing since everything that I’ve baked from this book has been great so far. I baked them for 25 minutes, which may have contributed to the somewhat dry texture.  I’d check them at 23 minutes next time and maybe they’d be moister.  They had a really subtle malt flavor and the walnuts gave it a contrasting texture, so leave them out if you like a smooth blondie.