Showing posts with label vanilla cake. Show all posts

Monday, 28 March 2016

Ice Cream Fake Out Cake


Anyone else dreaming of summer? Living in Vancouver, it’s been rain errryday and the Huz said that I’m not allowed to check the weather anymore. Well, for my friend’s birthday, I thought I’d bring her some summer. And since she has 2 adorable kiddies, I thought they’d like a fun whimsical cake.

My inspiration for this cake is Katherine Sabbath. Have you seen her work??? Mind blowing. Not only are her designs amazing, her flavor combinations are out of this world. I’m pretty much in awe of her. Check this out:

Here’s what I’ve done for my friend in the past:
I always try to do something big and different for her. It keep me on my game keeps me flexing my muscles.

Here’s my technique for decorating this cake. I’m not including a recipe for the cake itself - I did a vanilla cake with raspberry jam - because I wanted to focus on the decor. And lucky for you, I’ve worked out the kinks (trust me, there were some tears, right Huz?).

Ice Cream Fake Out Cake Decor
Buttercream Frosting - for sprinkle layer and “ice cream”
Ingredients
1.5 cups butter, softened (add ¼ teaspoon salt if using unsalted butter)
5 cups icing sugar
½ cup heavy cream, room temperature (nuke in the microwave in a time pinch)
2 teaspoons vanilla
¼ teaspoon almond extract
¼ cup jimmies sprinkles
2 Tablespoons chopped chocolate
1 Tablespoon raspberry jam
Food colouring of choice (I used a mix of blue and green gel)

Ice Cream Cone
Ingredients
1 sugar cone
¼ cup white chocolate, or white chocolate discs, or candy melts
¼ cup sprinkles or nuts or anything you want to decorate the ice cream cone with

Drip Icing
Ingredients
½ cup icing sugar
3-4 teaspoons water
Food colouring of choice (I recommend gel colour)

Tools
Large and mini ice cream scoops
Metal spatula
Piping bag


Decorating instructions
  1. Make buttercream frosting by whipping butter (and salt if using) with beater attachment in a stand mixer until fluffy. Add icing sugar and mix on a low speed. Gradually stream in cream as it’s mixing and beat until well incorporated and fluffy. Add vanilla and almond extract and beat until incorporated.
  2. Stack and fill your cake layers. I baked a vanilla cake in 3, 6-in cake pans and sliced them in half. In between the layers, I used raspberry jam. But sky’s the limit here in terms of flavour combos.
  3. Crumb coat the cake - apply a thin layer of frosting to the entire cake to seal in the crumbs. Scrape off any excess. Place in the fridge for 10 minutes.
  4. At this point, you’ll need to estimate how much frosting you’ll need for the sprinkle layer and the “ice cream” portions. Scoop out the amount that you’ll need for the “ice cream” into a bowl and set aside.
  5. With the portion of frosting you’ve portioned for the sprinkle layer, add sprinkles and fold in with a spatula. Feel free to add more if you want it extra sprinkl-y.
  6. Frost the cake with your sprinkle frosting and scrape off excess. If you want it extra smooth, put it in the fridge for 10 minutes. Dip a metal spatula in hot water and wipe off, and smooth out the frosting. You can add more frosting and repeat this process of refrigerating and smoothing out with a hot spatula.
  7. Next, colour the frosting that you will use as ice cream. In my design, I made a turquoise large scoop and smaller scoops of chocolate chip and raspberry ripple. For turquoise, I mixed blue and a small amount of green into the frosting. For chocolate chip, I chopped up chocolate and mixed it into the frosting. For raspberry ripple, I added 1 tablespoon of raspberry jam into the frosting and ran a few strokes through it with a spoon. And for the important part: Spread out the frosting on the bottom of their bowls and refrigerate for 10 minutes. This will give it the ice cream look when scooped out.
  8. In the meantime, you can do 2 things: decorate your ice cream cone and make your drip. First the cone: melt your white chocolate in a double boiler or in 10 second intervals in the microwave, stirring between intervals. Dip your the outer 1-inch of your cone in the melted chocolate, then dip in sprinkles or nuts. Place on parchment/wax paper/foil and harden in the fridge.
  9. Next the drip icing: Place icing sugar in a small bowl and add water 1 teaspoon at a time, stirring after each addition. Stop when you get a thick but fluid consistency. I recommend putting a drop of the icing on the lip of a cup to see how fast it drips down. If you’ve added too much water, you can add more icing sugar. Add food colouring and mix to incorporate (I recommend gel colour so that it doesn’t add more liquid to the drip).
  10. Apply the drip icing: I’ve seen this done in a number of ways, but here’s what I did - I put some of the drip icing in a small pastry bag with a small round tip. I applied beads of drip icing on the edge of the cake and allowed it to drip down. I put the remaining drip on top of the cake and spread it out with an offset spatula.
  11. Apply the “ice cream”: Scoop the ice cream frosting with an ice cream scoop and place on the cake. If the frosting is too hard, you can run the scoop under hot water (be sure to dry with towel before scooping). Place ice cream cone on the middle ice cream.
  12. Keep cake in the fridge. Bring up to room temperature before eating - 2 hours prior.

*What to do with extra frosting and cake: If you’ve found yourself with extra cake scraps from cutting off the dome of the cakes and frosting, why not make cake pops or cake truffles! You can keep both the cake scraps and frosting in the freezer until you’re ready to make these. I’ll do a post on this next!

Verdict: This cake was an absolute show stopper! I was really happy with the way it turned out and how much it resembled ice cream! Such a whimsical cake. I have so many ideas of how this ice cream technique can be used!

Ps. Does this remind of you Baskin Robins of the 90’s? I got a few of those comments.

Monday, 11 August 2014

Vanilla Strawberry Ice Cream Cake


As I mentioned in one of my previous posts, I recently bought a townhouse. To celebrate, I threw a housewarming party and decided to make an ice cream cake for dessert.

Dairy Queen ice cream cakes – yay or nay? I pretty much only like the cookie fudge middle. My plate is always left with sad looking vanilla and chocolate soft serve because I just eat the middle. But I think my problem with that cake is that it’s soft serve. If it was real ice cream, I think I’d love it.

So, my ice cream cake was going to be made with real ice cream. And not that stuff from the store that has a bunch of ingredients that I can’t pronounce, meaning they really shouldn’t be in my ice cream. I’m talking about the home make stuff – with egg yolks, and real vanilla, and only ingredients you’re familiar with! And you know what? It’s going to have cake too – because ice cream cake without the cake part, is just ice cream shaped like a cake if you ask me.

The great thing about this type of cake is that the options are endless! I went simple, but you can mix and match ice cream and cake flavours and add extras like cookies, crumbles, nuts, fruit, and sundae syrup between the layers. And multiple ice cream flavours!

Vanilla Strawberry Ice Cream Cake
Parts:
Vanilla cake
Vanilla ice cream
Strawberry jam
Whipped cream frosting
*Note, this cake takes 3 days to make

Vanilla Cake (Make on day 1)
Use your favorite vanilla cake recipe. I halved this one and baked it in a 6-inch pan. Feel free to use whatever size you like!

After baking and cooling the cake, cut into two layers. Wrap in plastic wrap and freeze overnight.

Alternatively, you can buy a pre-made pound cake.

Vanilla Ice Cream (Make on day 1 or 2)
You can use your favorite store bought ice cream. Or make it from scratch! I used this recipe by David Lebovitz. 
If making from scratch and refrigerating the base overnight, make on day 1. If not refrigerating base overnight, make on day 2 (same day as assembly).

Whipped Cream Frosting (Make on day 3)
Ingredients
2 cups whipping cream
1/3 cup icing sugar
½ teaspoon vanilla
Gel food colouring

Directions
1.  Chill metal bowl before whipping. Beat whipping cream until soft peaks.
2.  Sift icing sugar and add vanilla. Beat to stiff peaks.
3.  Add food colouring to your desired shade and beat to blend.
*I added a stabilizer (like Whip It http://www.amazon.com/Dr-Oetker-Stabilizer-Whipping-Packets/dp/B000NY8OLU), but since it’s going to be frozen, I don’t think it’s necessary in retrospect.


Assembly
Day 2:
1.  If using store bought ice cream, take out and soften for about 10-15 minutes before proceeding. If using scratch ice cream, it should be in soft-serve consistency (feel free to stick in the freezer until ready).
2.  Smear a little jam on the cake plate. Place frozen cake layer on top. Spread jam on top.
3.  Wrap stiff acetate tightly around the cake and tape to secure.
4.  Spread ice cream over the cake – up to you on how much and how tall you want the cake!
5.  Spread jam on the other cake layer. Carefully place it on top of the ice cream, jam side down.
6.  Freeze overnight.
Day 3:
7.  Make whipped cream frosting.
8.  Take acetate off cake. Frost cake with whipped cream and decorate to your preference. Freeze until ready to serve.
 
Acetate around the cake.


Verdict: This ice cream recipe was A-MAAAzing! So creamy, rich, and flavourful! I only used ¾ of it in the cake, so I had a bit left over. And good thing too because my friends requested it and devoured it! I’m dreaming up new flavour combos!

Tuesday, 13 May 2014

Pavlova + Cake = at least it sounds good!

It was the fiance's mom's birthday and I wanted to make a not-your-average cake for the dinner we were having at a restaurant. At first, I wanted to make a pavlova, but as I started making it, things were not working out and I had to figure out a way to salvage it. I didn't have time or ingredients to start over! I decided to make a single layer cake on the bottom, top it with the pavlova (or whatever came out of the oven) and add whipped cream to hold it together. I'll tell you right now that it didn't turn out as I'd hoped, but at least I learned a few things along the way:

Lessons learned while making this cake:
Do not wrap cake with a slice of bread. I read that to keep a cake moist overnight, a trick is to leave it out with a slice of bread on top. Well, I thought, Wouldn't it be better to wrap the cake in plastic wrap with a slice of bread on top? The answer is NO. The cake layer was waay too moist - like a pudding cake as someone described it. Ick. I should've just wrapped it in plastic wrap with out the bread as usual.

Making meringue in humidity is dangerous. OK, maybe not dangerous but inconsistent. The pavlova was supposed to be big and fluffy. It didn't get big, and it didn't get fluffy. The egg white and sugar mixture never formed stiff peaks on this humid Vancouver day.

Two tablespoons of egg whites out of the carton does not equal a large egg white from a shell. This is an eyeball comparison, but although the carton said they are equivalent, next time I'd use 3 tablespoons of egg whites to replace one large egg white.

If you want to have a go at this cake, take your favourite pavlova recipe (here's the one I used), half of a vanilla cake recipe (I used this one), and make some stabilized whipped cream, like this

Second time around, I would use a sponge cake for the bottom, like from here

Good luck! 


Here's a peek at the inside.

Friday, 9 August 2013

Chocolate Raspberry Cakelets and Coffee Frosted Mini-Loaves


I was making cupcakes for a birthday party planned for a week later (I tend to bake ahead of time and freeze) and I had extra batter.  It was a great time to pull out my cute baking cups that had been sitting in my cupboard for maybe 2 years and bake off some treats.  I had some tall cupcake liners and mini-loaf cups that my sister had brought back from Japan.  They were super cute, but the opportunity to use them never really came up as I tend to bake for birthdays and other celebrations and they never really fit.  Well, the time finally came! I had a BBQ to go to that weekend so I decided to experiment with some decorating techniques that I’ve been eyeing for a while and pawning off my experiments to my friends.


Chocolate Raspberry Cakelets

The recipe for the chocolate cake can be found here.  For the cakelets, I filled 3 tall cupcake liners.  After baking, I peeled them off because the dark batter soaked through and turned the liners dark.  Hence the inspiration for frosting the entire cupcake = cakelet!


Raspberry Frosting

Ingredients

1 cup salted butter, softened

4 cups icing sugar

1 Tablespoon cream

1 teaspoon vanilla

½ cup fresh raspberries


Directions

Combine all ingredients and beat until smooth.  It doesn’t get any easier than that, folks!


Decorating

Peel off cupcake lining.  Level the top if it’s too domed.  I left mine as is and faked it with frosting!


Roses – I piped roses with Tip #21 and filled in gaps with the same tip.  Here’s a link to a tutorial: http://iambaker.net/patriotic-rose-cake-video-tutorial/


Petal cake – I piped dots in a vertical line using Tip # 12, then used a spoon to smear the dots to the right.  I piped another line of dots beside the smeared first line of dots and smeared them to the right.  Here’s a tutorial: http://www.youtube.com/watch?v=WASVWn4nN6w


Ombre – I coloured some frosting a darker pink than the natural pink from the raspberries.  After putting on a crumb coat and freezing the cake for 10 minutes, I put the dark frosting on the bottom half of the cake.  I frosted the top half with the lighter colour frosting, then blended them together in the middle.  I dipped my spatula in hot water to smooth out the finish.  Here’s a tutorial: http://www.youtube.com/watch?v=tAMpdOcfzig


Coffee Frosted Mini-Loaves

I had enough batter to make three chocolate and three vanilla cakes in mini-loaf liners.  The chocolate cake recipe is the same as the above, and the vanilla is from here.


Coffee Frosting

Ingredients

½ cup salted butter, softened

2 cups icing sugar

1 Tablespoon cold coffee

1 teaspoon instant espresso powder

½ teaspoon vanilla

¼ teaspoon coffee flavoring (optional to bump up coffee flavor)


Directions

Combine all ingredients and beat until smooth.


Decorating

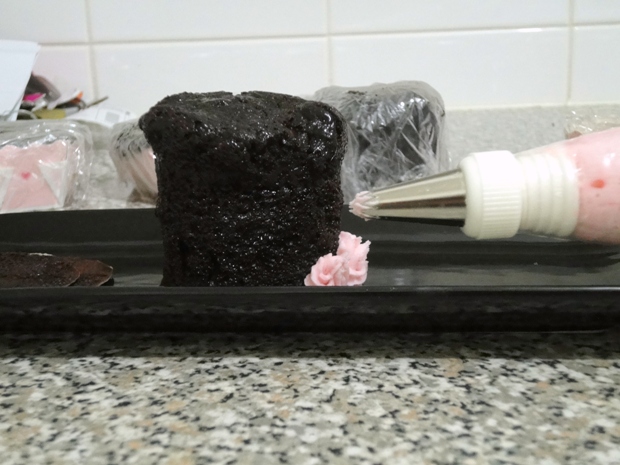
I used Tip #103 to pipe the ruffles by holding the piping bag perpendicular to the length of the loaf, with the narrow end of the tip facing me, and moving the piping bag slowly up the loaf.  I switched sides after each pipe.


Verdict: I think that these cakes turned out so cute!  It was fun to be able to try out a bunch of decorating techniques in one session on a small scale.  My friend definitely appreciated the experiments – they especially liked the raspberry frosting.  Feel free to add more or less raspberries depending on your taste – I like intense flavor!

Saturday, 2 February 2013

Housewarming Cake with German Buttercream


I have a whole list of cakes, cookies, frostings, and other desserts that I want to eventually make.  The issue is waiting for the right time to pull them out.  There’s a moist vanilla butter cake recipe that I’ve been eyeing and a German buttercream frosting that seemed like a good accompaniment.  I’ve heard of Swiss and Italian buttercream, but German?  I really wanted to try it.


I decided to pull out these recipes for a friend’s house warming party.  I made a chocolate house to place on top.  Check out the verdict at the end of the post!


Butter vanilla cake and cake syrup

Recipe from here.

Before baking.

After baking.


German Buttercream

Recipe from here.

I halved the recipe and used vanilla bean gel/paste instead of vanilla beans. 

When adding butter to the custard, it will curdle at first, but keep whipping – it will come together.  I had to whip for about 15 minutes.
Waiting for the custard to thicken.

Straining the custard.

Plastic wrap right up against the custard, ready for the fridge.

After beating and ready to use.
Assembly

Place first cake layer on a platter.  Brush the top and sides with syrup.  Apply a generous amount of buttercream.  Repeat with other layers.


Pieces of the house made of tempered chocolate.


Verdict: Unfortunately, this cake and buttercream recipe did not quite work for me.  The cake had good favor, but was not as moist as I thought it was going to be based on the description.  It was a good thing I used the cake syrup on the cake as it definitely helped to add moisture.  The German buttercream tasted good and was denser than Swiss and Italian meringue buttercreams (so I’m told), but it wasn’t as smooth as I like my frosting.  It even started to separate after sitting on the cake for a while.  And don’t bother making it ahead of time and putting it in the fridge thinking that it will save time – it took me a full 15 minutes of whipping to make it homogenous again, which didn’t save me any time at all!  The buttercream also did not take colour well.  I had to add icing sugar to the frosting to get the food colouring (gel) to mix well.  Overall, the cake was satisfactory.